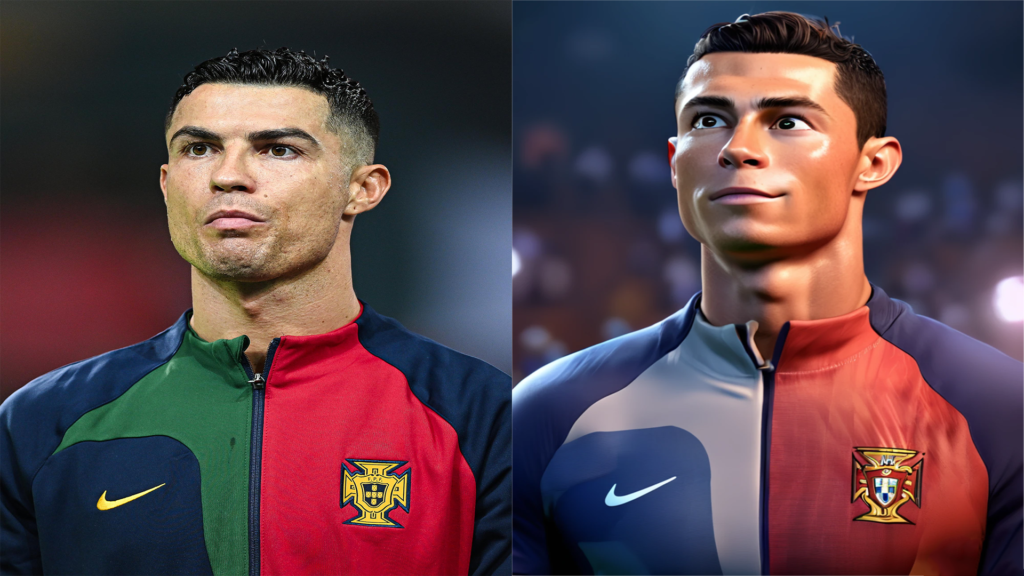
Transforming ordinary images into captivating cartoons or 3D animations is a fantasy and a reality, thanks to advanced artificial intelligence tools like Stylar AI. This platform unlocks the full potential of creative expression, allowing you to breathe new life into your images effortlessly. In this tutorial, we’ll guide you through the simple steps of using Stylar AI to convert your images into eye-catching cartoons or 3D animations. From creating your account to exporting your final masterpiece.
Creating a Free User Account
To access the features of Stylar AI, you first need to create a free user account. This step is crucial for saving your projects and accessing them later. The sign-up process is quick and requires only basic information. Once your account is set up, you can immediately start exploring the platform’s capabilities.
Starting a New Project
With your account ready, it’s time to initiate a new project:
- Navigate to the “New Project” option on the dashboard.
- Enter a project name.
- Set the aspect ratio according to your preference. Stylar AI offers flexibility in choosing the dimension that best suits your image or design requirement. A 1:1 aspect ratio is common for social media platforms, but you can select what works best for your vision.
The next step involves importing the image you wish to transform:
- Click on the “Import Images” option. You’ll be prompted to select an image from your device.
- Choose the image you envision converting into a cartoon or 3D animation. Stylar AI supports various file formats, making it convenient to upload directly from your computer’s hard drive.
- Once uploaded, you can adjust the image to fit the content area, ensuring that your workspace aligns perfectly with the dimensions of your image.
Describing the Idea and Concept
After your image is uploaded and properly adjusted in the workspace, it’s time to guide Stylar AI in understanding the transformation you envision:
- Navigate to the “Image to Image” option. Here, you’ll find a Prompt box where you can describe the idea or concept you have in mind for your image.
- For those who find it challenging to articulate their vision, Stylar AI offers an “Auto prompt” feature. This analyzes the components of your uploaded image and generates a descriptive prompt automatically, ensuring the AI understands the context and elements present in the image.
Choosing the Style and Adjusting Settings
With your vision clearly communicated to the AI, the next step is to select a style that aligns with your creative goal:
- From the “Choose a Style” section, explore the various available options. Each style has its unique flair and effect, from innocent and cute to more detailed and realistic 3D animations.
- Adjust the “Structure Match” slider to dictate how closely the generated image should match the input in terms of content and structure. This is crucial for maintaining the essence of the original image while applying the new style.
- The “Advanced” section houses the “Negative Prompt” feature, allowing you to specify elements you want to exclude from the transformation. This ensures that unwanted aspects are not included in the final output.
Reviewing and Placing Transformed Images
After setting your preferences and initiating the transformation, Stylar AI will present you with thumbnail previews of different variations based on your instructions:
- Take your time to hover over these thumbnails, reviewing each option in a larger view.
- Once you’ve selected the transformed image that meets your satisfaction, click on “Place on Canvas” to add it to your workspace. This adds a new layer over your original image, which you can then adjust or edit further.
Saving and Exporting Images
After adding the transformed image to your workspace and making any final adjustments, it’s time to save your work:
- Click on the “Export” button located in the top right section of the interface.
- Select the file type you desire. JPEG is commonly used for its balance of quality and file size, making it ideal for online sharing and use. However, choose the format that best fits your project’s requirements.
- Once you’ve made your selection, click on the “Download” button. Your computer will prompt you to choose a save location for your image. Select or create a folder, and then save your image.
Managing Layers for Multiple Exports
If your project involves multiple layers or images:
- Navigate to the layers panel to manage which layers are visible or hidden. This feature is crucial if you’ve created several transformations and wish to save them individually.
- To save images with different layers, simply turn off the visibility icon for the layers you wish to exclude from the current export.
- After adjusting the visibility settings, click on the “Download” button again. Repeat this process for each layer or image variation you wish to save.
Conclusion
Thank you for following this tutorial on converting your images into cartoons or 3D animations with Stylar AI. We hope you found the process informative and inspiring. Remember, the only limit is your imagination. So, keep experimenting with different styles, prompts, and images to discover new and exciting ways to express your creativity.


Don’t forget to leave your comments with any questions, and subscribe to the newsletter for more AI-related content.
